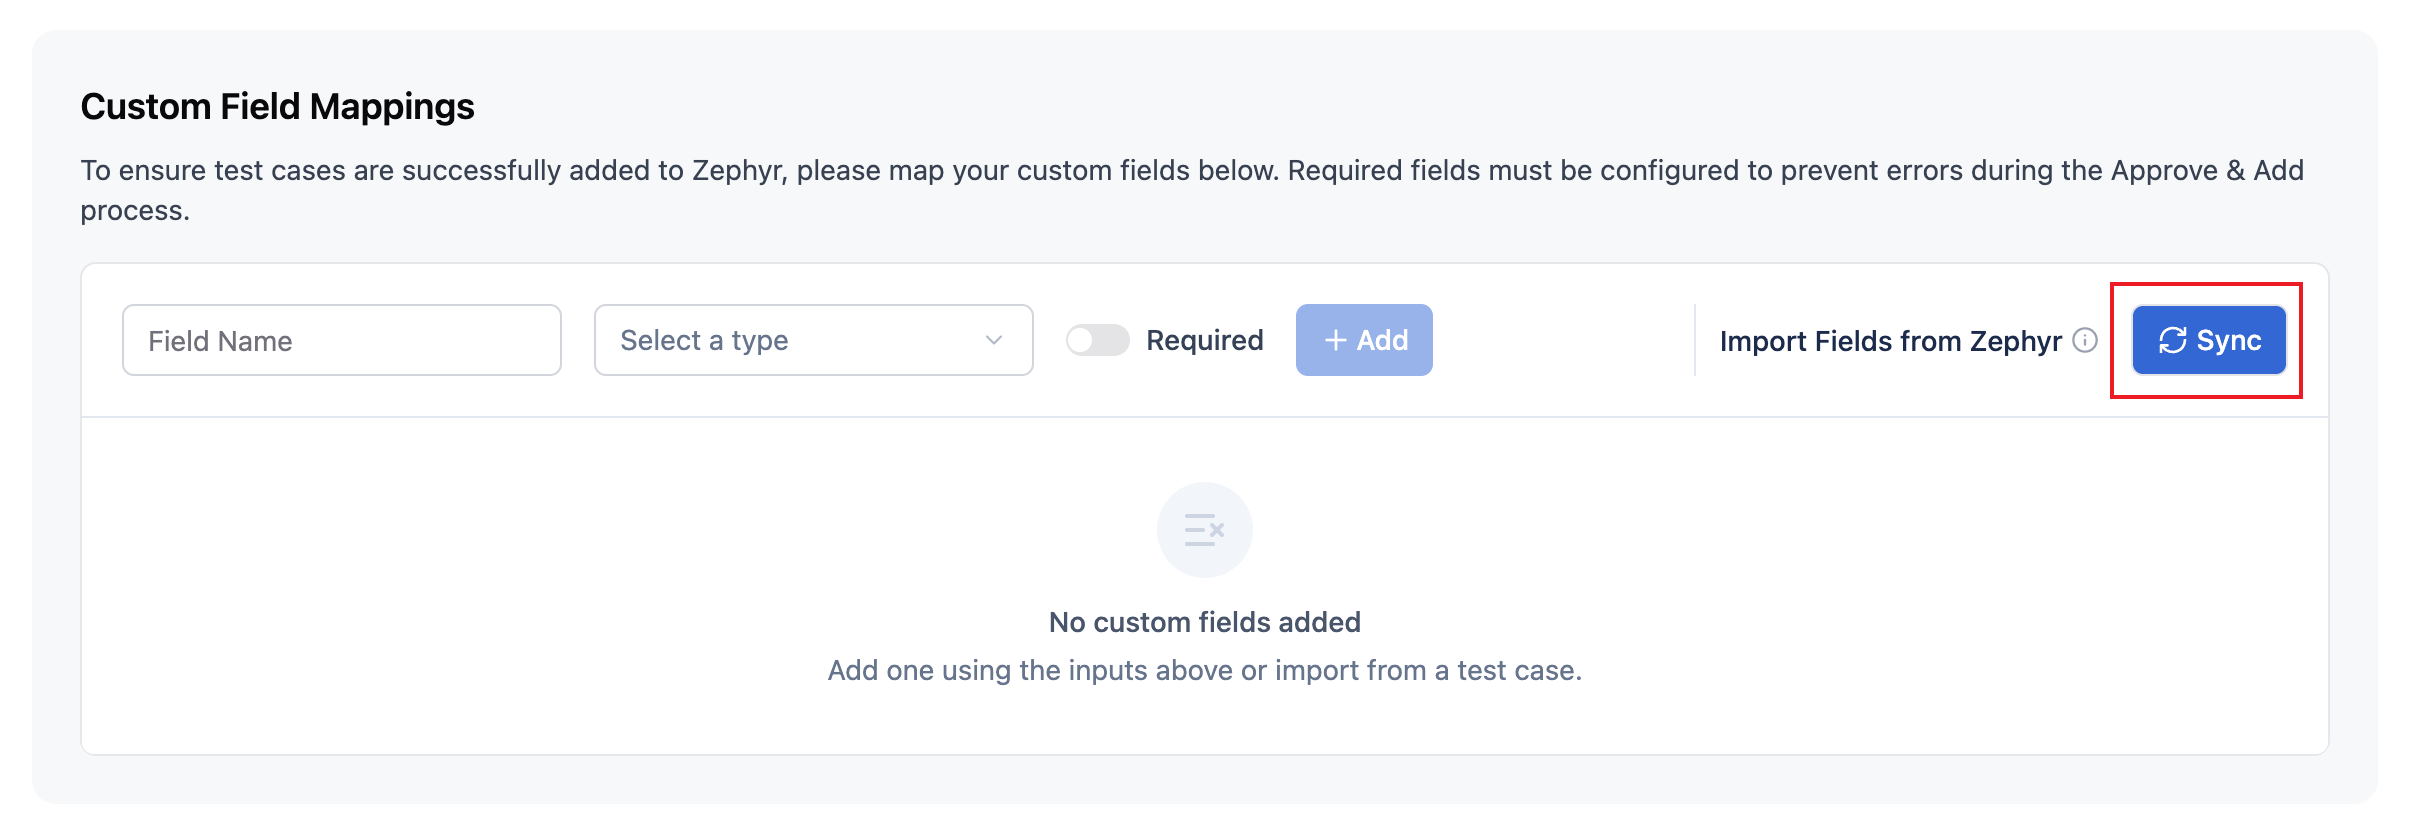
Custom Field Mappings
Map your Zephyr custom fields in Reqase Lite to ensure test cases are successfully added to Zephyr. Required fields must be configured to prevent errors during the Approve & Add process.
Step 1: Add Custom Fields
You can add custom fields either automatically by importing them from Zephyr, or manually one by one.
Auto-Import from Zephyr (Recommended)
Prerequisite: Make sure you have already configured your Zephyr API Integration before using Auto-Import. The Sync button requires a valid Zephyr connection to fetch custom fields.
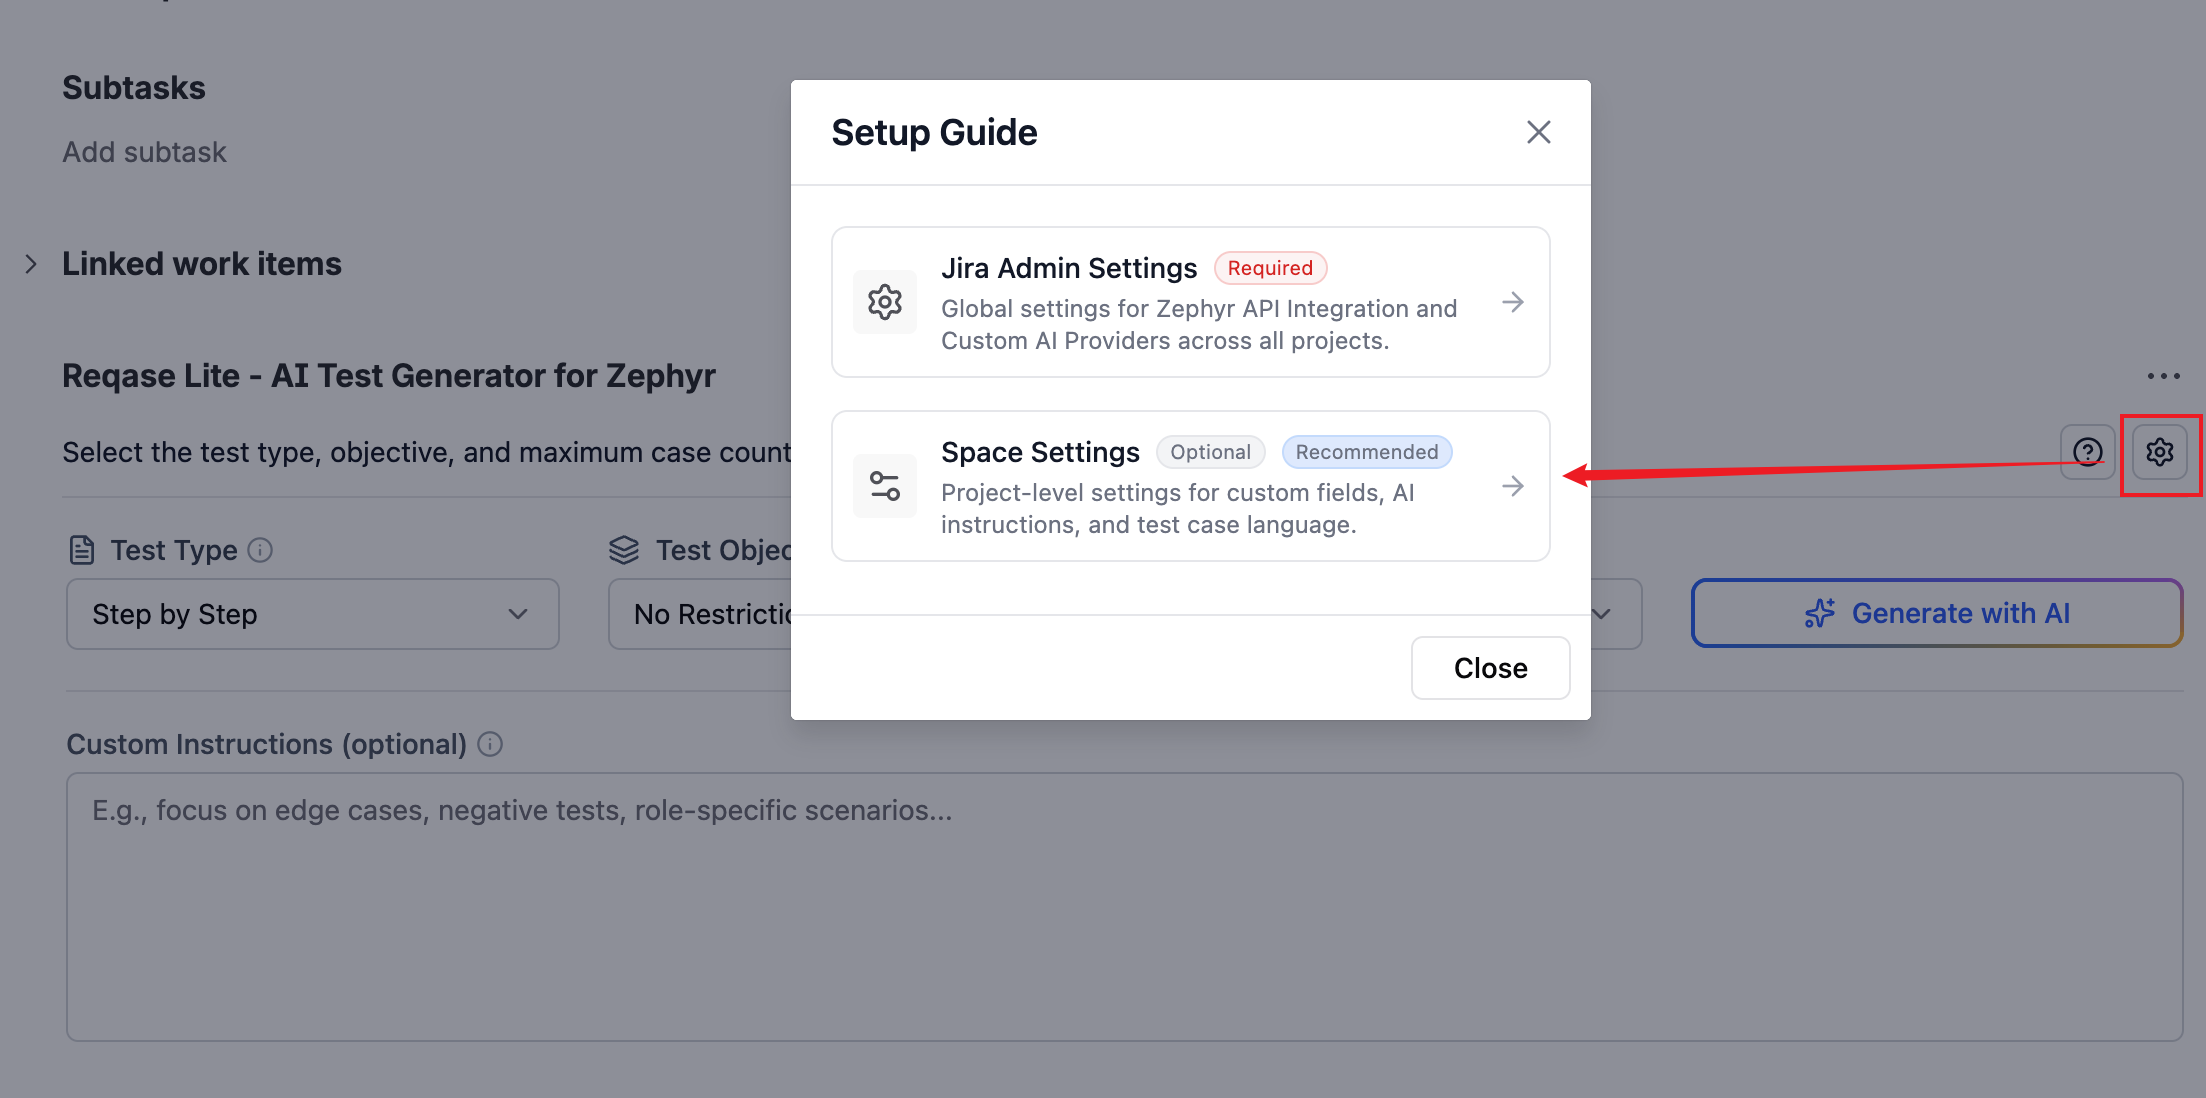
Go to Space (Project) Settings → Reqase Lite Settings → Custom Field Mappings, or click the Settings icon in the top right corner of the Reqase Lite App and select Space Settings.
In the "Import Fields from Zephyr" section, click the Sync button.
The system will automatically fetch and detect unmapped custom fields from your Zephyr project.
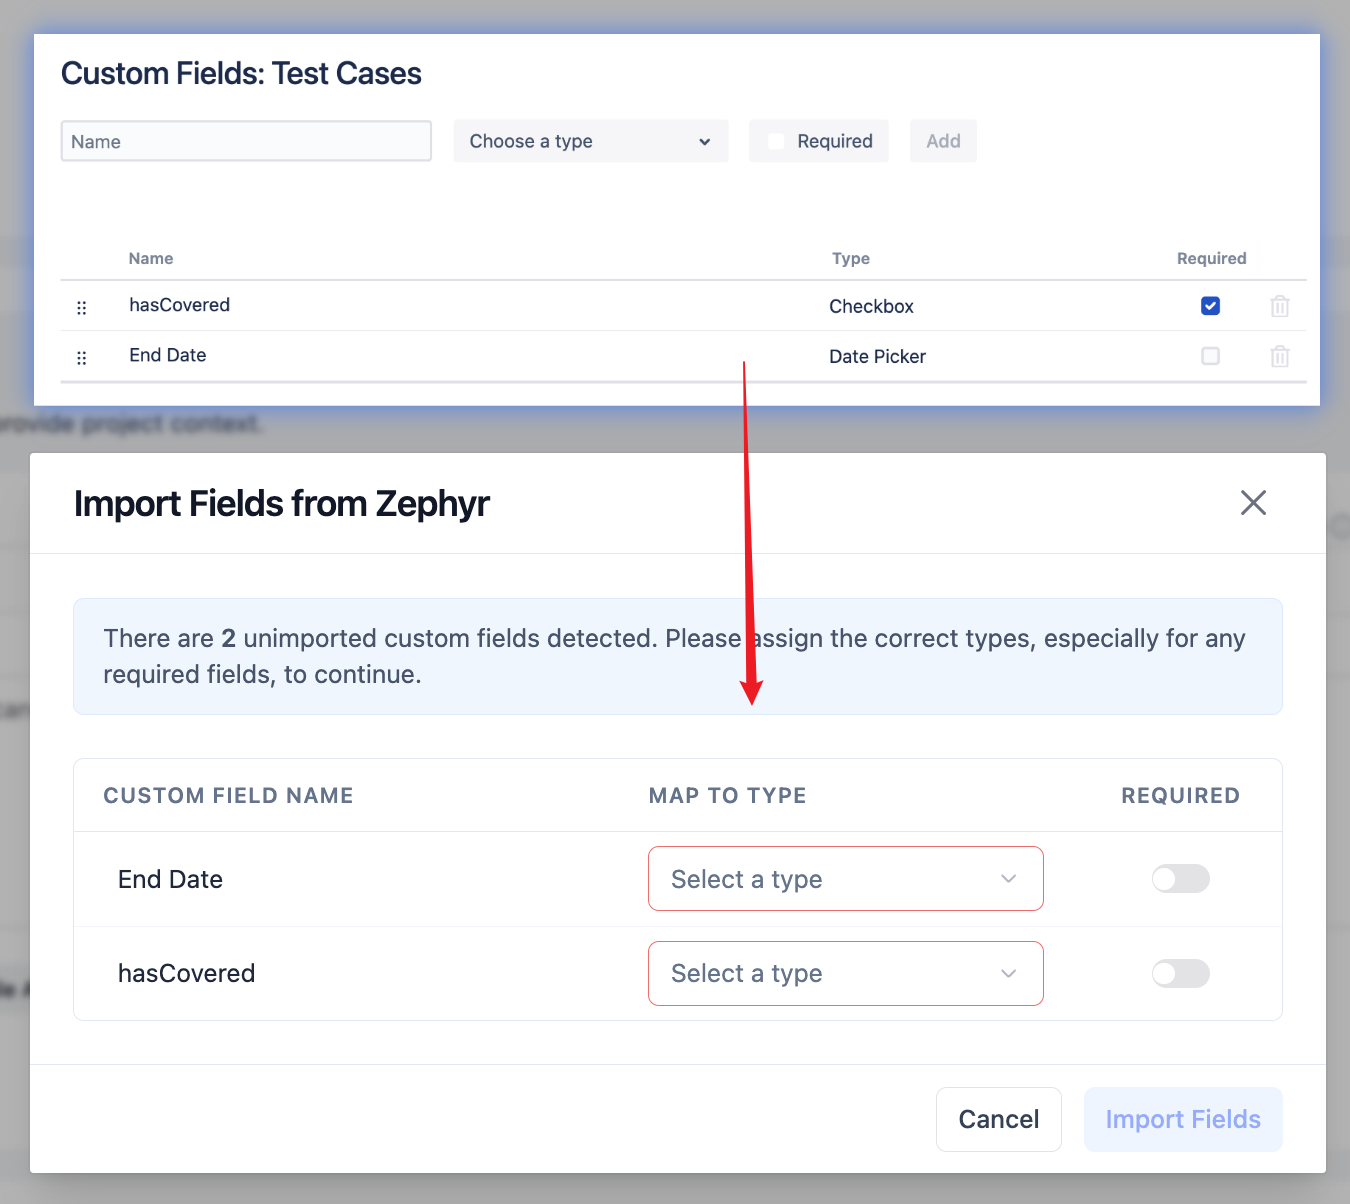
In the pop-up modal, review the imported fields, assign the appropriate Type for each, and verify if they are Required.
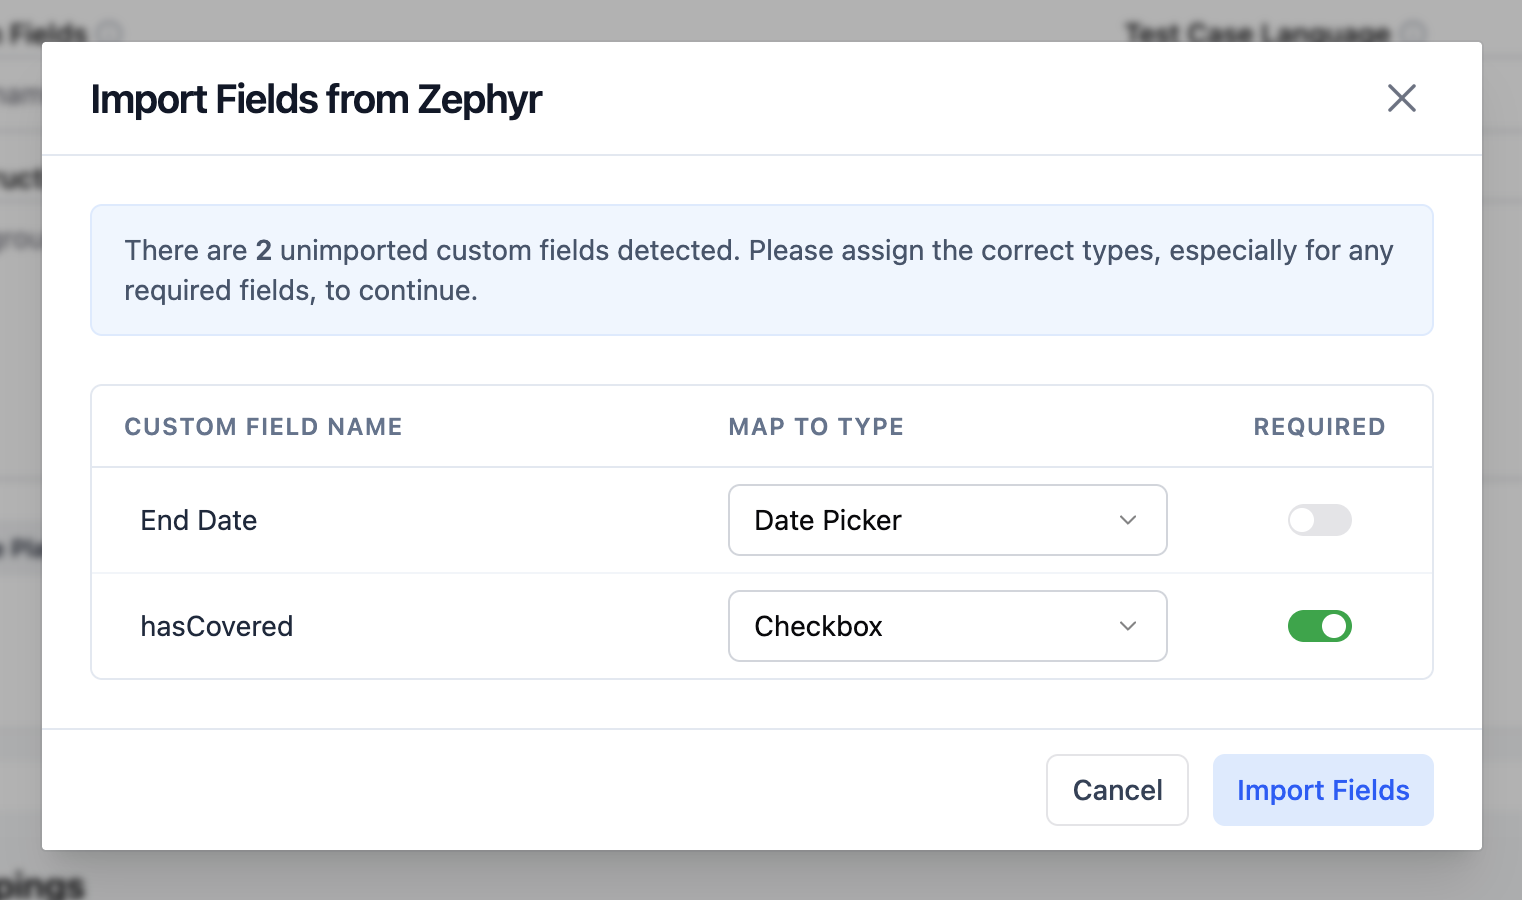
Click Import Fields to add them to your configuration list.
Add Fields Manually
Enter the custom Field Name in the designated input field.
Choose the correct Field Type (e.g., Text, Select List) from the dropdown.
Toggle the Required switch if this field is mandatory in Zephyr.
Click Add to append it to your fields list.
Warning
Adding a custom field that does not actually exist in Zephyr will cause case submission failures. Please ensure the field name matches Zephyr exactly.
Step 2: Manage Configuration
Once fields are added to the list, you can freely manage and organize them:
Edit Details
Click the edit (pencil) icon next to a field to rename it, then save or press Enter.
Toggle Required Status
Use the switch in the row to change whether the field is required or optional.
Reorder Fields
Click and drag the grip icon (⋮⋮) on the left side of a field to arrange the display sequence.
Delete Fields
Click the trash icon to remove a mapped field.
Warning
Deleting a field that is marked as Required in Zephyr will cause case submission failures.
Step 3: Configure Select List Options
If a field is mapped as Select List (Single Choice) or Select List (Multi Choice), you need to define its selectable options.
Click the Expand (>) icon next to the field name to reveal its options configuration.
Click Add an option, enter the value, and click the Save icon or press Enter.
Reorder: Drag and drop options using the grip icon (⋮⋮) to arrange them in the correct order.
Modify/Remove: Use the edit or trash icons next to any option to rename or delete it.
Step 4: Fill Custom Fields during Review
Once configured, your custom fields will be available when reviewing AI-generated test cases:
Open the Review Suggested Test Case modal for a generated test case.
Locate the configured custom fields displayed at the bottom of the right panel.
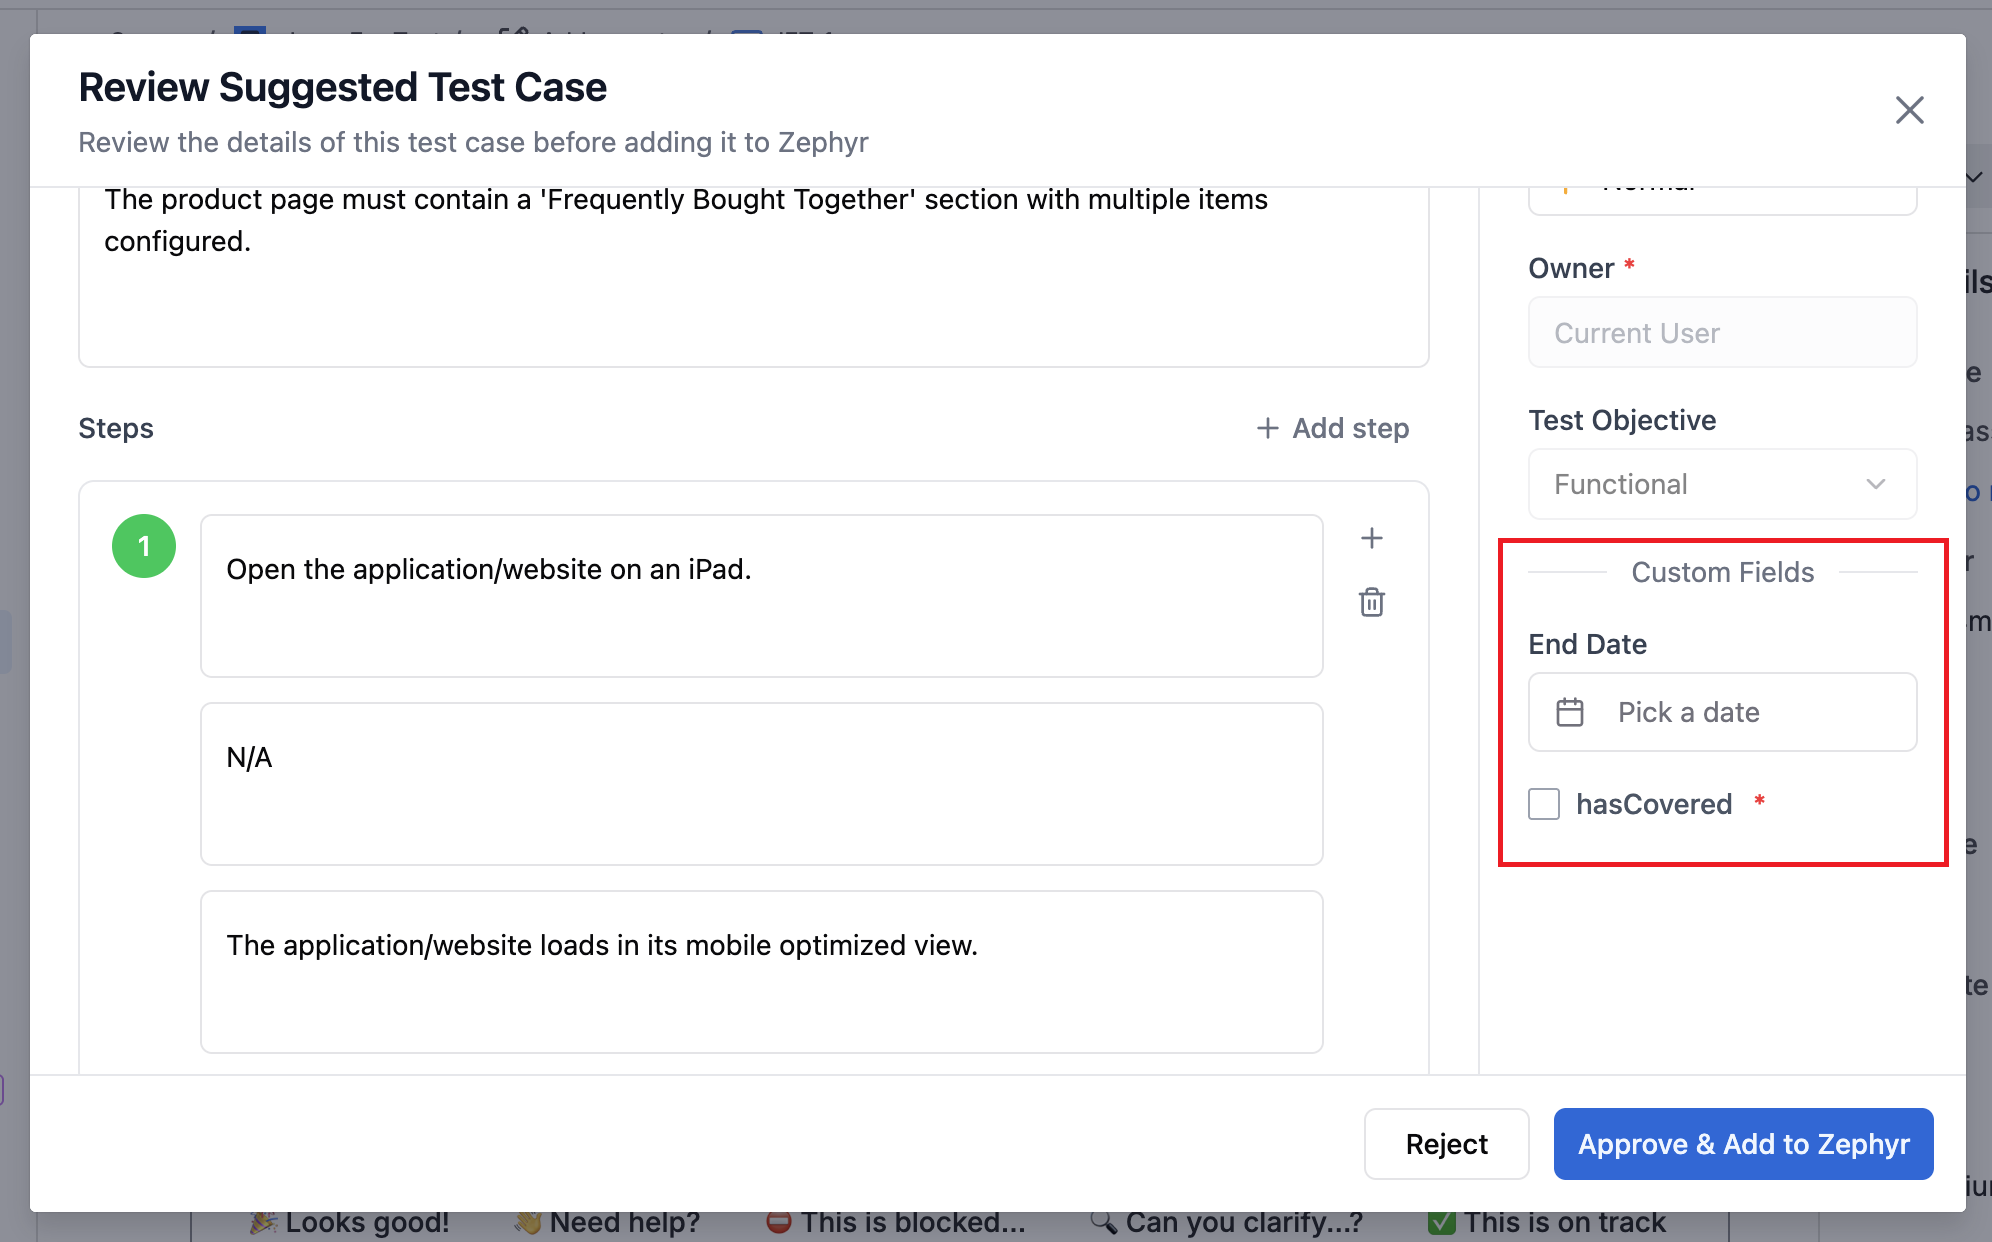
Fill in or select the appropriate values (ensure all Required fields are filled).
Click Approve & Add to Zephyr to successfully submit the complete test case.
Next Steps
Now that your Custom Field Mappings is configured, you can optionally set up a custom AI provider or start generating test cases.